Upcoming Events

april-events-2015


The De-Stash Bash is happening at the TOMS Shoes on S. Congress April 26th
11-5pm.

Think of it like a group arts and crafts garage sale. Over 7 of Austin’s craftiest makers will be purging their stash of craft supplies. From hard to find vintage jewelry parts in bulk to brand new bolts of fabric. Something for every crafter. Don’t come looking for finished items. This is all about the supplies.

This event will be like Michaels, Hobby Lobby, Etsy and a flea market all rolled into one without the long lines, politics, postage fees and dust. Plus there will be a band and cocktails!

Here are a few things you might find.

– Vintage beads
– Sewing trim
– Soap making molds
– Collage ephemera
– Yarn
– Craft books and magazines
– Fabric (new and vintage)
– Buttons
– Candle making supplies
– Scrapbook paper
– Jewelry findings

Vendors include….

Jennifer Perkins formally The Naughty Secretary Club
http://jenniferperkins.com/
Jen has travelled the country for years collecting vintage jewelry supplies. She is letting people into her treasure trove of a stash which includes bakelite, kitschy deadstock from the 60’s, Cabbage patch kid cabochons, brass stampings and more vintage beads than you can shake a stick at. Jen has worked in the craft industry for years and will and will have a little bit of every craft supply from doll heads to glitter.

Anne Marie Beard of AnneMarie: Style for the Individual
http://www.annemariebeard.com/
Anne Marie is an avid collector of vintage and unusual fabrics, findings and trim which she’s used in her accessories business for 13 years. She is often set up on S. Congress, spent years at Austin City Limits and is a regular at the annual Cherrywood Art Show. Build your stash of funky fabrics and findings while she makes room for new goodies!

Leslie Bonnell of Stitch Lab
http://www.stitchlab.biz/
Leslie Bonnell is the owner of Austin’s premier sewing studio Stitch Lab. Leslie is a former costume designer, jewelry designer and mixed media artist. Expect to find top quality fabrics, trims, beads, findings, found objects and ephemera in her booth.

Chia of Chia Hats.
http://www.chiahats.com/
No winter in Austin is complete without the site of furry hats with ears created by Chia. A long time staple of the Austin DIY scene Chia will be set up selling fabric, faux fur remnants, yardage, notions and buttons.

Sierra Baily of Manic Trout.
http://www.manictrout.com/
Sierra Bailey, designer of Manic Trout jewelry will be bringing her surplus of brand new and vintage jewelry supplies. Just like her bold and colorful statement jewelry, the materials she uses are filled with color and whimsey. You’ll find gemstones, Czech glass, crystals, brass charms and stampings, various chain and vintage bits and pieces in Sierra’s destash!

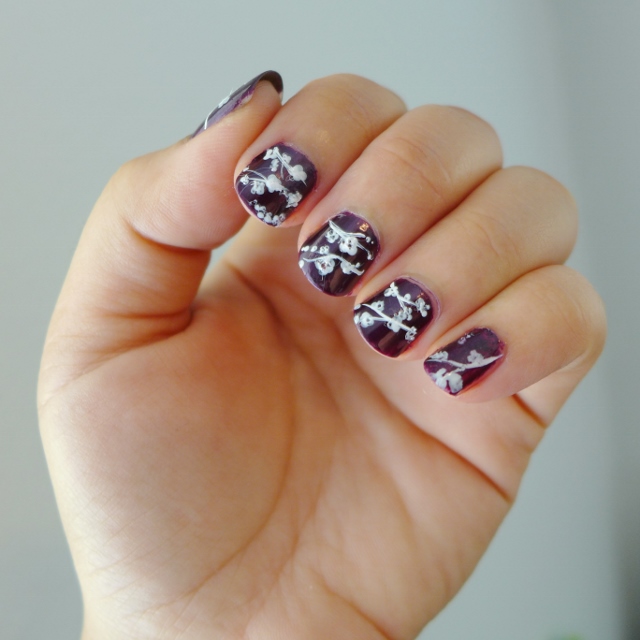
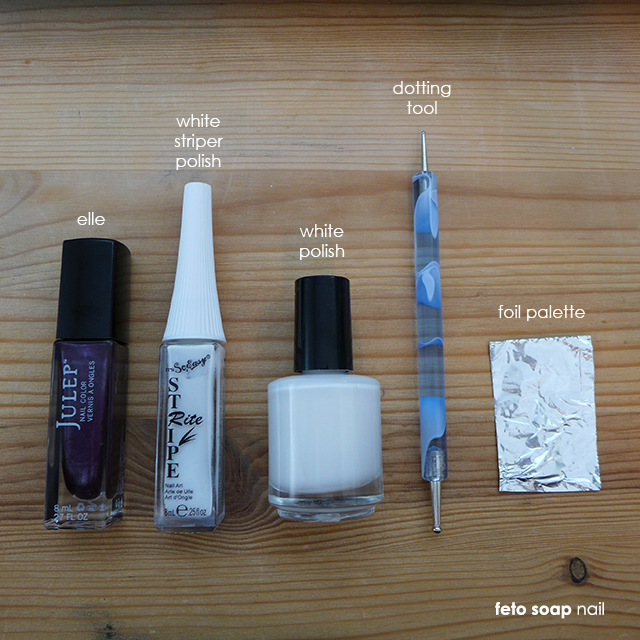
Lisa Chouinard – Feto Soap
https://www.fetosoap.com/
Lisa has been making soap & candles for the past 11 years atfetosoap.com. She has amassed quite the collection of soap and candle making materials. Expect to find both new and used soap & candle molds, skin-safe fragrances you can use in your diy perfumes, bath salts & more!

Becka Spellman – Baby Bolt
http://www.babybolt.net/
Becka makes adorable applique bibs and wearables for the junior set. Needless to say between vending on Etsy, The Austin Flea, Blue Genie and more she has tons of trims, vintage sewing notions, buttons, fabric yardage and scraps.

tisa jackson – tisa’s creations
www.tisascreations.com
tisa creates simple, modern, fun, beautiful {paper}. a stationery boutique started in 2004. nothing is better than getting a hand written letter or card in the mail. let us help you make the best of all your celebrations. we love all things paper. expect to find extra paper, envelopes, packaging items, washi tape, rubber stamps and more.

And more! Plus did we mention the band and cocktails? Can’t wait to see you.


Valentine’s Day Decor

This is not a sponsored post. I just love using my Silhouette Cameo!

Valentine's-decorAfter Christmas I bought a pack of battery powered lights, thinking I’d do the classic frosted/vinyled glass block craft and put that on my mantel, but I remembered I had downloaded the free shape of the week last year from the Silhouette Design Store, and decided to tackle that 3D project instead. I followed their instructions to a T and was able to assemble to Heart Marquee with success! It looks so snazzy lit up.

heart-marquee (1)
Inspiration Mantel from the Silhouette Blog

I loved the grouping of frames with the marquee on the Silhouette blog post, so I decided to try to replicate it with the frames I had on hand. I cut out the quatrefoil out of matte black wall vinyl after measuring my 11 x 14″ floating frame and transferred it to the glass with transfer tape.

I downloaded a grey pinstripe digital background paper from a store on Etsy and printed it out on my printer instead of running to the craft store for one piece of paper. Then I cut out the XOXO with Silhouette’s double-sided adhesive and sprinkled black glitter on it.   Totally beats working with wet glue + glitter! Viola! The look, recreated! I had an extra shadowbox frame, so I put the Run away with me in it (it was in the floating frame last year from a project inspired by the Beautiful Mess gals.)

6a00d8358081ff69e2019b04d0c28d970d-800wi
Inspiration from A Beautiful Mess


I wanted to make a Valentine’s themed throw, so I  cut out the Love Stack image from the Silhouette Design store out of heat transfer vinyl, and cut out white for the background (offset/outline) and gold for the lettering. I’m chuffed about how it turned out! I picked up an 18×18″ pillowcase I found in the clearance section from Hobby Lobby ($3.49) and pillow insert with the same measurements, and my throw was complete in under 30 minutes!

Love Stack Throw


Do you decorate for the holidays? I’d love to see it! Leave your decor link in a comment below!

How to make a Chalkboard Clipboard

P1020155 (640x640)I’m crazy about clipboards. I use them ALL the time for everything! I hang art from them and put calendars on them. Every project gets a clipboard. While I don’t mind the brown chipboard that they come in, I have been wanting to dress some up, so today I present to you, my clipboard chalkboard to-do list!

*Some of the following are affiliate links.  Thanks for supporting this blog!

I bought a 24 -pack of clipboards on Amazon (you remember I use these for everything right?) but I saw them at Dollar Tree the other day, Cricut Chalkboard vinyl & a chalkboard pen from Joann’s and put this together!

First I measured my clipboard and drew it in Silhouette Studio. I like to do this step so I can have an idea of how my project will turn out + to gauge how much material I will need to cut out. I do this step for most projects, actually.

Capture1

I downloaded a rectangle scallop shape from the Silhouette Design Store here. I right-clicked and ungrouped the planner project shapes and dragged the scalloped rectangle shape over to the clipboard and clip I had drawn.

I hadn’t worked with this material before, so I went with the default vinyl cut settings in the software with my blade on 2. That didn’t seem to cut all the way through, so I left it in the machine and re-cut it and changed my blade to 3.

The chalkboard vinyl material was 12″ wide, so I *could* have left it on the roll and cut it without the mat, but you lose cutting area on the left and right border if you cut it without a mat as shown. The red line is the cut border. It’s hard to see in the cutting with a mat picture. If I hadn’t cut it with a mat, I would have risked the left and right edges of the scallops not getting cut. So a mat was used with my Silhouette Cameo Electronic Cutting Machine.

cutting without a mat
cutting with a mat

I tried to apply it directly to the clipboard skipping the Transfer paper step. I got a million bubbles and wrinkles in the few inches I tried, so I stuck it back on the backing paper and got out the transfer paper and covered the vinyl completely with the transfer paper and smoothed it out with my squeegee. P1020143 (640x640)

I peeled off one edge of the vinyl from the backing, and applied it from the bottom of the clipboard and squeegeed it to the clipboard until where it met the clip. P1020146 (640x427)

I used my exacto knife to cut the vinyl to fit around the clip at the top

P1020148 (640x427)

and smoothed out the rest of the vinyl at the top of the clipboard with my squeegee.

Viola! My Chalkboard Clipboard is complete! I’m planning on using this for home to do list items. I love the texture of this vinyl – I bought a roll of a different brand (I can’t remember which one) last January and never ended up using it because it was flimsy & just felt like regular vinyl, so I’m happy this one worked out! P1020153 (640x640)

What I Used:

I made this project for January’s Silhouette Challenge which theme is organizing. The bonus challenge this month was to use vinyl.

Want to Check Out More Silhouette Projects?

My Silhouette Challenge buddies and I are all sharing projects on our blogs today, so peruse the projects below for a wealth of Silhouette inspiration!

Organizing With Icons Butterfly Labels Customizing Your Erin Condren Life Planner Weekly Layout Organizing Your Craft Supplies with Labels Weekly Menu Box Peg Board Entry Way Order In Kid Land A Fun Way to Label Binders Sugar and Spice Looking Oh So Nice Turning a Plain Cabinet into Something Beautiful DIY Cash Budget Envelopes Flour and Sugar Pantry Container Labels Personalized Hair Bow Organizer Organize your Refrigerator DIY Vinyl Decorated Coupon Organizer 2015 Blog Planner Designed For Dragonfly & Lily Pads Laminated Labels with Your Silhouette The Secrets of How We Built Our DIY Play Kitchen Creative Way to Dry Winter Mittens Organizing Canvas Toy Bins with Labels Kids Closet Storage {with Rubbermaid Drawer Dresser and Vinyl Labels} Cute Gold Binder Labels {2015 Organization} Easy Vinyl Storage Organization and TWO Free Cut Files Personalized Ring Holders Upcycle for Organization Organizing Makeup with Style: A Monogrammed Makeup Case Vinyl Tupperware Labels How to Make a Chalkboard Clipboard Christmas Card Memory Book Simple DIY Holiday Storage Labels DIY Vinyl Frame Calendar with {FREE CUT FILE} Ribbons & Tapes Upcycled Organizing Box Print and Cut Pantry Labels

1. Please Excuse My Craftermath… // 2. Simply Kelly Designs // 3. Daily Dwelling // 4. Ginger Snap Crafts // 5. Our Southern Home // 6. Sowdering About // 7. The Moberg Family // 8. Decor Adventures // 9. Pineapples and Pinecones // 10. Patina Paradise // 11. The Thinking Closet // 12. It Happens in a Blink // 13. Adventures in All Things Food // 14. From Wine to Whine // 15. Practically Functional // 16. Dragonfly & Lily Pads // 17. unOriginal Mom // 18. One Dog Woof // 19. Creative Ramblings // 20. My Favorite Finds // 21. Create it. Go! // 22. A Prudent Life // 23. Where The Smiles Have Been // 24. Barb’s Life // 25. Everyday Paper // 26. Pitter and Glink // 27. Peanut Life Adventures // 28. Feto Soap Blog // 29. Our Rosey Life // 30. Two Purple Couches // 31. My Paper Craze // 32. TitiCrafty // 33. Lil Mrs Tori

Make 2015 your best year yet in life or business

At the start of each year, I set my business and personal goals. One way I’ve been organizing my goals is by using Leonie Dawson’s Create Your Shining Year workbook + calendar. She has great tips about breaking down your goals into small, achievable chunks and reviewing them monthly to help keep on track. I started using her workbook last year with real results! One of my goals last year was do every Flagship Maker Faire in the US. I made it to all of them except for Detroit! (Bay Area, New York, Kansas City) and exhibited at the most mini Maker Faires that I ever have (Houston, Tyler, Austin, New Braunfels) for a total of seven Maker Faires! I was able to share the joy of making soap and nail polish with thousands! (which is in line with my mission statement:  Enable anyone to create their own handmade beauty products!) I’m in the process now of creating a small accountability group so we can all encourage each other to grow and check-in on our goals monthly. You can get your very own copy of her book for under $10 here.

The 2015 Create Your Shining Year workbook & calendar is an incredibly popular & useful tool to help you plan out & make happen your most incredible year in life or business (or both!). Over the last six years, thousands of women have used this workbook with the most amazing results. It’s the best planning tool available to help you make your year your most exceptional yet!

Used by entrepreneurs, artists, mamas, creatives, coaches, teachers and women of all ages, the Create Your Shining Year in Life and Biz workbooks are filled with dozens of pages of powerful worksheets & a printable calendar to help you create your amazing new year.

Facebook_Graphic_V3

***This post contains affiliate links, which means that if you click on one of the product links, I’ll receive a small percentage from your purchase.***

My New Year’s Eve Dress almost didn’t make it!

10881687_278283192295815_2992649085776845229_nThe Mr & I had decided to go to a Roaring 20’s New Year’s Eve Party, and when I got Express.com’s newsletter showing off their party dresses, I saw one with fringe ALL over it (perfect, right?), so I overnighted it to my old address! Oh no! I didn’t have the contact for the couple that moved into my new place, but wait!  My friends at Latika Soap had met the couple that moved into my old condo at their Thanksgiving/Friendsgiving meal, so they were able to pass me their number.

I had talked to one half of the couple (Amy) before! She had called me in December to feature feto soap for Local holiday shopping picks for Community Impact Newspaper. Small world, huh? Within an hour, I had my dress! *phew*

I wore my long black satin gloves with it, a boa + flower in my hair. I tried cobbling together a headpiece/headband, but I have way TOO MUCH HAIR for those things!

We danced a little and drank a little, and were in bed before 1am! Here’s the only picture we took of the night! For dancing a boa and elbow-length gloves were a bit much, so those came off as soon as I got in the door.

I hope your new year’s eve was great. If not, hey, it’s the next day now. (and it was just one day, after all.)


My To Make List for 2015

Paper succulent in a geometric planter. Both designs are from the Silhouette Design Store.

I’m trying to spend more time on personal projects, with a goal of making *something* every day/do something you love every day. I made a few things with my Silhouette Cameo machine this week, but this was one of my favorites:  a paper succulent in a geometric planter.

These are a few of my crafty wishes and dreams for 2015. I love using my Silhouette Cameo machine to help get my projects done, and I’d like to get more familiar with my sewing machine.

cut

This would make a great tee or throw! I was thinking gold on black, grey or navy.
  • double-sided adhesive for valentine’s themed wall art – I have the background paper ready, but waiting on the double-sided adhesive Update: 12/30 the materials came in. I’ll post my valentine’s decor mantle soon.
  • use frosted vinyl to create an etched look on glass – I have some giant knitting needles that need a home, and I’d use an image of a ball of yarn. Also thinking about making one of these for a friend that crochets. Update: 12/30 the materials came in and I vinyled the two vases. I’m going to do a side-by-side post about etching vs using frosted vinyl.
  • more decorative throws for our couch either with Heat Transfer Vinyl or Fabric Stenciling Update: I made one on 12/28 and will include it in my Valentine’s Decor post
  • make a stamp (either with the Silhouette or a carving tool) to make my own patterned fabric for throws. I like pillows, can you tell?
  • make a clear glass block with lights in it Update: Lights acquired!
  • painted/stenciled wood sign
  • cut fabric with my machine for cards and wall hangings – I haven’t cut out fabric yet with my machine, so it’s something I’d like to tackle
  • heat transfers for tees. So many ideas and HTV purchased, but need t-shirt blanks.
  • chalkboards – a large piece, maybe cover some clipboards with it

sew

  • fabric wall hangings that I’ll probably use HTV or stencil and put dowels at both ends.
  • curtains for the french doors sunroom with the fabric I brought back from India
  • gusseted makeup bag(s) with some awesome black and gold oilcloth I picked up from the Stitch Lab
  • bolster pillows with wood grain fabric I bought last year at Stitch Lab
  • zippered throws

grow

  • wheatgrass
  • succulents

Christmas Decor with my Silhouette Cameo

In-between the holiday rush, I decorated the house a little for Christmas since we were hosting Christmas dinner at our home this year. This was the first year that I decorated… I didn’t grow up around decorated houses – my mother’s decor was more practical/utilitarian. I think the only thing we had on the wall was a calendar in the kitchen.

One of my goals for this year was to use my Silhouette Cameo (a electronic cutting machine) to help me decorate my house.

My first idea about how I’d use it was to make papercut art (flat and 3D) and frame and hang it around the house.  I also cut out some paper snowflakes, tea light holders and a small tea light Christmas village for our mantel! I also cut out a few ornaments and decorations out of cardstock. Cutting paper dulls your blade fast though, so I switched mediums – to cutting vinyl! P1020116

I picked up a few rolls of red and green wall vinyl, and decorated a column and above our TV in the living room with it. I also found some white window cling material and cut snowflakes and other silhouettes for my windows.  I love that window clings are reusable, so I won’t have to cut them out again next year. They are also easier to remove than wall vinyl from glass.

At the end of the month I hosted an ornament making/decorating party. We used scrap vinyl I had on hand to decorate ornaments, cut a few out of paper and made a floating ornament (with a vinyled piece of acetate inside of a clear ornament). I also used vinyl to customize gift bags & tags, plus whatever else it would stick to. Overall, I’m happy with what I was able to create/decorate during the holidays with my Silhouette! I think it’s the most I’ve ever used it, so I learned a ton in the past month with very few craft disasters! I received it as a Christmas present last year and was just dying then to make Christmas decorations (but had to wait almost a year to get started!) I also practiced etching glass with a vase I picked up. P1020117

I’m already working on Valentine’s Day decor for my mantel! Pictures/blog post to come soon!

Holiday shows year end wrap-up

The end of November and December was a whirlwind of shows you guys! It started with my first show of the holiday season, the Winter Holiday Art Market in Houston, then I immediately came home and loaded my booth up for the Blue Genie Art Bazaar that opened on Black Friday, and I was at Renegade Craft Fair for Small Business Saturday the next day! I had a one weekend reprieve from doing shows, and then I was back at it at the Cherrywood Art Fair!

Blue Genie ran through December 24th, open from 10am – 10pm, so I was there in the mornings and most evenings to restock and straighten up my booth. It was my home away from home this December. I moved this summer from our place on 360/2222 to NACA, so now I’m only 10 minutes from the Marchesa Hall and Theater, where the Blue Genie Art Bazaar is held.

Speaking of moving, I barely got my shelving installed in my work space when holiday show prep was upon us! I had two great apprentices Ashley and Tiffany, who came in at least once a week  (but usually more) to help me package and occasionally make some of my goodies. They helped me at shows and gave me feedback when I wanted to change things up with my products. They also helped me keep sane during the holiday rush. I’m so appreciative of ALL of the hours they put in. Without them I wouldn’t have been able to keep up!

Thank you EVERYONE who came out and bought handmade. You make this all worthwhile!

Winter Holiday Art Market in Houston!

newsite_WHAM_2014_header6Hey lovelies! It’s that time of year again when I make the short trek to my hometown, Houston for the Winter Holiday Art Market at Winter Street studios this weekend! Here’s a peek of what I will be bringing:

Houston Mini Maker Faire

1959272_10154705025530285_1635729995052297072_n


Houston! I can’t wait to be back to make soap and nail polish with you guys next weekend at the Houston Mini Maker Faire.

Mike Hinkle wrote a great list of reasons to go to this year’s Maker Faire (you know, other than to make soap and nail polish), so I’ll share them here:

MF_WeAreAllMakers-300x300Let’s get right to the point: we were all born to be learners and creators, but sometimes this gets lost in the rush and distractions of modern life. If you want to get back in touch with your inner passion to learn / create / design / build / make, Maker Faire is the place for you! Here you can see real projects, real experiences and activities, made by real people who might even live on your street. While there are some cool things to purchase if you want, Maker Faire is outstandingly about learning and doing. If you’ve never been to a Maker Faire before, you’ve never seen anything like this! Simply put, this will be the most informative and inspirational event of the year in Houston.

Key signs you’re ready for Maker Faire:

  • You’ve heard about cool things Makers are doing and want to learn how to do it yourself
  • Your attention span is longer than 6 seconds or 140 characters
  • You’re sure there’s more to life than what you can see on a screen
  • You’ve heard about some amazing new tech thing and you want to see it for real
  • You’re a student and you want to actually use, apply and experience things you’ve learned in the classroom
  • You fear going to exhibitions and shows because you don’t want to be chased by people trying to sell you things

 Click here for a full list of exhibits, activities and events at the Houston Mini Maker Faire on Saturday, November 1, 2014 at the Stafford Centre.

Click here to purchase tickets


ModCloth’s Nail Klub and Dresses challenge

I’ve moved into my new space, so the nail polish is out of storage now. Horray! Recently, one of the ModStylists at ModCloth asked me if I’d like to submit a design for the Nail Klub and Dresses challenge. I hadn’t done my nails in forever (moving is tough on a manicure, right?) so I was happy to have an excuse to do my nails and to give myself a challenge.

I used Touch of Tracery as my inspiration dress: nail-klub-modcloth-collage

Julep’s IT Girl Elle as the background color for my manicure, a white striper polish (those are the ones with the thin liner brushes), a feto soap white polish for the flowers, a dotting tool to make the flowers, and foil for my palette. (picked up the foil trick from nails y’all.) I used the striper brush to make the branches – not unlike my cherry blossom manicure I posted on Instagram. In fact, it’s almost a greyscale (purplescale?)  version of the same mani, but with more flowers. How’d I do?

nail-klub-tools


Bath & Body Workshops at The Thinkery ALL SUMMER!

Each month I’ll be teaching a different bath & body related workshop at the Thinkery Austin Children’s Museum this summer! Here’s a peek of the line-up! In a short 10 days from now, you can make nail polish with me! 

makepolishMake Your Own Nail Polish (Ages 5 & up)
Saturday, June 14, 2:30 – 4 pm

Create your own custom nail polishes on the spot! We have 100+ micas (shimmer colors) and glitters for you to choose from to combine your own toxin-free nail lacquers. Make sheer, opaque or glitter-bomb polishes. You can also bring your existing polishes to make new blends with them. Mix your polishes with the guidance of Lisa Chouinard, owner of the handmade beauty company, feto soap.

Ticket Prices:

$44: 1 Child ($12) + 1 Adult ($12) + Activity Fee ($20)
$40: 1 Member Child ($10) + 1 Member Adult ($10) + Activity Fee ($20)
1 Extra Child ($12) + Activity Fee ($20)
1 Extra Member Child ($10) + Activity Fee ($20)

Register online (select “Family Workshops” for Event Type), or call (512) 469-6201

July 19th Sugar Scrub Making WorkshopMocha Moms Sugar Scrub Workshop

Personalize your own sugar scrubs with a variety of essential oils, fragrance oils, and exfoliants! Each child/adult pair will take home two custom scrubs they have created.

Ages 5+ 1.5 hours

bath bombs (1)August 9th Bath Bomb Making Workshop

Everything you need to know to recreate these fun bath time treats on your own. Learn what makes them fizz & whirl when you drop them into water. This is a hands-on class where you will customize the scent & color of one batch of bath bombs. A supply resource list will also be provided so you can keep making them on your own!

2.0 hours Ages 7+ 

Can’t make it to one of these classes? Interested in hosting a party where your guests learn to make bath & body goodies? Email me! Groups of 10 start at $250 for two hours of making fun.


Comicpalooza Houston Wrap-up

making nail polish
making nail polish at comicpalooza

The Houston Mini Maker Faire invited me to join them at their exhibit space they had at Comicpalooza (The Texas International Comic Con). I had never been to or exhibited at a Con before, but I signed up anyway to see what Houston had in store for us! The con attendees were enthusiastic about making, so I’m so glad we went! We had a chance to tell all the people who stopped by our booth about the upcoming Houston Mini Maker Faire that will happen on Saturday, November 1, 2014 at the Stafford Centre. They are still looking for exhibits, so sign up to bring your project to the faire!

P1010811-1
P.J. in front of a replica of the car from Supernatural.

Soap and nail polish we made at Comicpalooza:

….and last but not least, my awesome booth helpers Jacob, P.J. & Eva! I used to work with Jacob & Eva way back when at The Methodist Hospital, so it was good to get to see them for a bit during the 4-day con! P.J. ran the soap side of my booth while I taught people how to mix up their own custom polishes.


Maker Faire Bay Area 2014 Wrap-up

P1010738

I had a blast at this year’s Maker Faire as usual! We got in early on Friday and set up the booth. After setup, Maker Faire Bay Area hosts a happy hour/dinner for all the makers so we can mingle and get to know each other. Gerard’s Paella was there with their delicious paellea: P1010746


Maker Faire had a photo booth set up this year with the robot: 2014-05-16 22.54.43

We got there early this year, so we got to walk around and see a few of the exhibits in between setting up and dinner:

Here are some of the soaps we made together:

Samantha was just one of my many awesome booth assistants! P1010760

Did you make soap with me and forget to pick it up? It’s lost and found time! If this is your soap, email me at lisa@fetosoap.com and I’ll ship it to you from Austin! I’ll hang on to them for one month.
P1010798

Until the next one! I’m planning on heading to Kansas City at the end of June and Detroit for their Maker Faires with my Make Your Own Soap booth.

kansascitymakerfairemakerfairedetroit

Make Your Own Soap Booth comes to Bay Area Maker Faire!


I can’t wait to travel to the Bay Area for this year’s Maker Faire! This year there will be 900+ exhibits ranging from Technology, Science, Craft, Fashion, Art, Food & much more! What exhibits are you excited about seeing? (other than mine, of course!)

Take a look at the program guide for highlights, or browse all 900+ makers here. I’m back with my Make Your Own Soap booth inside the Expo Hall where you can customize a bar of soap on the spot!


The Austin Mini Maker Faire is this weekend!

AMMF_Poster_GraphicandInfo-500x660

Holy Crapola folks! Can you believe it’s been a year since the last Austin Mini Maker Faire? It’s not feeling so mini anymore! We are back at the Travis County Expo Center (back where Austin Maker Faire set up in 2007) . It will be chock full of Art, Crafts, Robotics & more! We’ll even have a 3D printing village!

I’ll have my Make Your Own Soap Booth there of course, where you can create a custom bar of soap on the spot! Continue reading

Narwhal, plus friends

P1010495-1

I’ve been wanting to try my hand at cutting wall decals, and I thought it would be fun to use them to decorate the wall above my mantel with them for spring. We’ve had a wooden narwhal installed over the fireplace since January. (the Mister’s xmas present)  I wanted to give him some company because he looked lonely, so I downloaded some narwhals I found at the Silhouette store and cut some out with some 12″ x 12″ Cricut wall vinyl I picked up at JoAnn’s.

Now the wooden narwhal is the king of the narwhals… Next month’s challenge is flowers! I can’t wait! I have a few ideas, so let’s see what I can come up with! I ordered 10 yards of white vinyl to play with… giant dandelions might be in the works!

Want to Check Out More Silhouette Projects?

My Silhouette Challenge buddies and I are all sharing projects on our blogs today, so peruse the projects below for a wealth of Silhouette inspiration!

Spring Cleaning - Custom Canisters I Love Paris In the Springtime Etching for Sping - Mug Personalization for the April Silhouette Challenge WHEELY excited about spring No-Sew Fabric & Burlap Peter Cottontail Banner Narwhals, plus friends Gold Fern Easter Eggs Mr and Mrs Easter Egg Head Easter Bunny Plate Welcome Spring - A Sign From Tile Paper Flowers Wall Art DIY: Bunny-Stamped Goodie Bags for Easter Inspirational Window Now We Have Everything Nursery Art Spring' and Flowers Paper Banner Glitter Jars with a Happy, Hoppy Bunny Made with the Silhouette + Free Cut File! Mother's Day Wreath Decorate A Watering Can With Vinyl! April Showers Sketch Pen Printable Spring Wreath Burlap Garden Flag with Heat Transfer Vinyl Pretty Little Herb Pots Peter Cottontail Door Hanger Spring Has Sprung Spring Has Sprung - Subway Art Bloom And Grow Sunflower Bouquet for Teacher Appreciation Sharpie Easter Eggs Tear Open Easter Egg Cards Look what's Blooming! ~ Silhouette Challenge Everblooming Paper Bouquet Silhouette Challenge: Spring Polish Swap Card [B] is for Bloom: Scrap Lumber Flower Vases Tulip Time - Fridge Magnets Neon Paper Pinwheels {tutorial} A Happy Spring Card Sketching Just Got Easier! Spring Bunny Baskets Bird Nerd Easter Eggs Easter Peeps Treats with {FREE} Printables and Cut File Garden Bench Update

1. Dream a Little Bigger // 2. So Much Better With Age // 3. Adventures in All Things Food // 4. Creative Carnival // 5. The Kim Six Fix // 6. feto soap // 7. One Dog Woof // 8. The Experimental Home // 9. From Wine to Whine // 10. Architecture of a Mom // 11. Grey Luster Girl // 12. Minted Strawberry // 13. Designed Decor // 14. Tried & True // 15. Silhouette School // 16. Bringing Creativity 2 Life // 17. Weekend Craft // 18. Practically Functional // 19. Please Excuse My Craftermath… // 20. McCall Manor // 21. unOriginal Mom // 22. Creative Ramblings // 23. A Tossed Salad Life // 24. A Glimpse Into Barb’s Life // 25. Kate’s Paper Creations // 26. Simply Kelly Designs // 27. Cutesy Crafts // 28. Persia Lou // 29. Whats Next Ma // 30. Two Purple Couches // 31. The Frill of Life // 32. Nearly Handmade // 33. Get Silvered // 34. Ginger Snap Crafts // 35. Life After Laundry // 36. The Sensory Emporium // 37. Monograms & Cake // 38. The Thinking Closet // 39. My Paper Craze // 40. Chicken Scratch NY

“I’m not good at painting my nails.”

I’ve been teaching lots of Make Your Own Nail Polish workshops lately, and something I’ve been hearing a lot from women about doing their own nails or nail art is “I could never do that.” or “I’m not good at painting my nails.” “It looks like a 5-year old painted my right hand.” I have a secret you guys. I’m kind of terrible at painting my nails. and at nail art. It takes me forever, y’all! I usually ding them before they dry, and then have to start over. But I’ve been doing it more lately and getting a little better at it each time! Through the instagram hashtag #nailart I have learned to use a small concealer brush to clean up the polish up quickly from your skin, and I even found out about a beginning nail art class held by @nailsyall through the instagram nails/nail art community here in Austin and took it! I had a book on nail art, but it required a bunch of supplies I hadn’t accumulated yet, so I’m glad I took a class. She showed us how to use nail art polish brushes, dotting tools & showed us how to make our own stamps from plastic wrap along with using foil as a palette. I also read/watch a lot of nail art tutorials.  I couldn’t paint a leopard to save my life during the @nailsyall class, but on my 2nd and 3rd attempt (pictured) I was able to on the practice wheel. It helped that I didn’t use a color dot in the center for me to make the shapes. I painted over my first leopard (it’s the green nail) because it was so bad, ha!

Getting better at painting your nails takes practice. So do your nails often, and you’ll get better at it! Pictured are most of my manis from 2014. I figured out I like doing themed nails (like if I’m going to an event, I try to match the event’s colors). So there are a few red and blue combinations for Maker Faire. Last night I did the red nails with white outline because I’ll be at the thinkery teaching soapmaking today. I might do a dot outline for my right hand – polka dots are one of my favorite nail art designs so far. They are easy and look so cute! All you need is a dotting tool, pin head, or bobby pin to dip into a little drop of nail polish on your palette. Are you on instagram? If you want to see my latest mani or project, follow me @fetosoap.

Meet the Makers Series at the Thinkery

thinkerylogomake-your-own-soap

Avery and I are helping kick-off the Meet the Makers Series  for the Austin Mini Maker Faire at the new Austin children’s museum in Austin, the Thinkery this Saturday, April 5th from 1:30-3:30pm. We’ll be helping you create a custom bar of soap on the spot! Supplies are limited, so come early!

1830 Simond Ave http://thinkeryaustin.org/visit-us/hours-and-location/ The Austin Mini Maker Faire is on May 3, so save the date! Get your advance price tickets now!